
How to configure PXE network booting for Kali Linux
I had this blog post in the pipeline for too long, so I am finally happy to publish this tutorial on how to setup PXE to network boot a Kali Linux live system.
Most mainboards allow to boot an operation system from the network. It can be useful when no operating system is installed on the device itself or when the operating system is broken. The Preboot Execution Environment (PXE) and your DHCP server can then communicate with each other and allow you to boot i.e. a live system to fix your computer.
For this whole setup to function properly, I assume that you have a linux-based gateway somewhere in your network with an own private IPv4 subnet. As I said before, the goal will be to boot a Kali live iso over the network on another computer.
My testbed
As I didn't have a separate system at hand, I decided to go with two VirtualBox VMs bridged together. For that, I created a dummy interface on my host system with the following commands:
$> sudo ip link add dummy type dummy
$> sudo ip link set dummy up
$> ip link
5: dummy: <BROADCAST,NOARP,UP,LOWER_UP> mtu 1500 qdisc noqueue state UNKNOWN group default qlen 1000
    link/ether c6:83:44:b9:dd:26 brd ff:ff:ff:ff:ff:ff
Afterwards I spun up two VMs and bridged them to the dummy interface:
- A
ServerVM with two interfaces: 1x NAT + 1x Bridge - A
ClientVM with one interface: 1x Bridge
The Server VM boots a simple Debian 9 live iso, so that we start the configuration from scratch.
DHCP configuration
After the boot process has finished, the Server VM shows the following two interfaces:
$> sudo ip link
2: enp0s3: <BROADCAST,MULTICAST,UP,LOWER_UP> mtu 1500 qdisc pfifo_fast state UP mode DEFAULT group default qlen 1000
    link/ether 08:00:27:b5:3e:ca brd ff:ff:ff:ff:ff:ff
3: enp0s8: <BROADCAST,MULTICAST,UP,LOWER_UP> mtu 1500 qdisc pfifo_fast state UP mode DEFAULT group default qlen 1000
    link/ether 08:00:27:af:53:f1 brd ff:ff:ff:ff:ff:ff
The first one, enp0s3, is the NAT'ed interface, so that we can install software from the internet. The other one is the bridge to dummy over which the Client will boot kali.
PXE looks for a DHCP/BOOTP server on the network to get information about from where to boot. That means, we'll have to install and configure a DHCP server first :
$> sudo apt-get install isc-dhcp-server
We only want it to listen on the "internal" interface, so we need to adjust the configuration file in /etc/default/isc-dhcp-server accordingly.
$> sudo cat /etc/default/isc-dhcp-server | grep -v "#"
INTERFACESv4="enp0s8"
INTERFACESv6=""
And now we'll tell the DHCP server to serve a private subnet to our clients. I decided to use 192.168.5.0/24 here and the resulting /etc/dhcp/dhcpd.conf should look like this:
$> sudo cat /etc/dhcp/dhcpd.conf
subnet 192.168.5.0 netmask 255.255.255.0 {
  range 192.168.5.10 192.168.5.100; #You can change this
  option domain-name-servers 8.8.8.8; #You can change this
  option domain-name "pxe.boot"; #You can change this
  option routers 192.168.5.1;
  default-lease-time 600;
  max-lease-time 7200;
  allow booting;
  filename "pxelinux.0";
}
The important bits here are the allow booting and filename "pxelinux.0" options which enable the network booting. The other ones can be different or adjusted by you depending on your setup. We'll see the pxelinux.0 again in a second.
TFTP configuration
Let's continue with the Trivial File Transfer Protocol (TFTP) daemon that we'll use to send the boot files and finally a filesystem over to the devices that would like to boot.
Install tftpd-hpa and restart the DHCP and TFTP server:
$> sudo apt-get install tftpd-hpa
$> sudo systemctl restart isc-dhcp-server tftpd-hpa
TFTP's configuration file is not long and does not need any changes:
$> cat /etc/default/tftpd-hpa
# /etc/default/tftpd-hpa

TFTP_USERNAME="tftp"
TFTP_DIRECTORY="/srv/tftp"
TFTP_ADDRESS="0.0.0.0:69"
TFTP_OPTIONS="--secure"
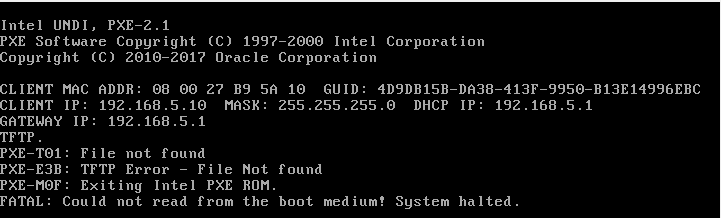
So far, so good: If you start up the "Client" VM, it should try to boot, but complain about missing files:
Boot configuration
The final step is to put the right files in the right location and the network boot should work :-)
As configured above, TFTP looks for files in the folder /srv/tftp. To keep everything clean and tidy, we'll create a separate folder for Kali and the PXE:
$> sudo mkdir /srv/tftp/kali /srv/tftp/pxelinux.cfg
Next, we have to create several files:
pxelinux.0pxelinux.cfg/defaultmenu.cfgvesamenu.c32
Download the pxelinux.0 and vesamenu.c32 files from Debian's repository. Both are needed to initiate and display the boot selection menu.
$> sudo wget https://cdn-aws.deb.debian.org/debian/dists/wheezy/main/installer-amd64/current/images/netboot/pxelinux.0 -O /srv/tftp/pxelinux.0
$> sudo wget https://cdn-aws.deb.debian.org/debian/dists/wheezy/main/installer-amd64/current/images/netboot/debian-installer/amd64/boot-screens/vesamenu.c32 -O /srv/tftp/vesamenu.c32
The file /srv/tftp/pxelinux.cfg/default should have the following content:
$> sudo cat pxelinux.cfg/default
include menu.cfg
default vesamenu.c32
prompt 0
timeout 0
We'll use menu.cfg to define what systems can be booted over the network. In our case we'll just have one entry pointing to our kali files:
$> sudo cat menu.cfg
default kali
label kali
        menu label kali
        menu default
        kernel kali/vmlinuz
        append initrd=kali/initrd.img boot=live components username=root hostname=kali-live fetch=tftp://192.168.5.1/kali/filesystem.squashfs
Trying to boot over the network should result in a simple looking boot menu with an option labelled kali:
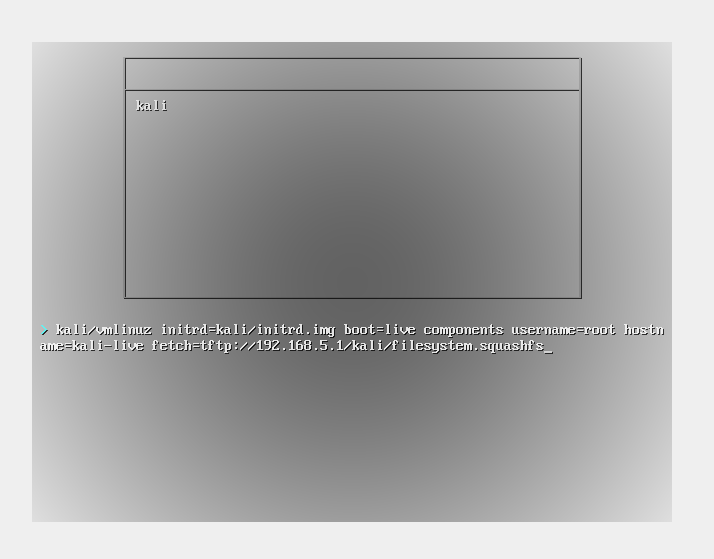
But it still will fail to boot, because it won't find the referenced kali/vmlinuz, kali/initrd.img and kali/filesystem.squashfs.
The easiest way to obtain them is to download the one of the Kali ISOs from their download page. I used 7z for the sake of simplicity to extract the contents from the .iso:
$> mkdir /tmp/kali && cd /tmp/kali
$> wget http://cdimage.kali.org/kali-2018.3a/kali-linux-light-2018.3a-amd64.iso
$> 7z x kali*.iso
Copy the aforementioned three files into the /srv/tftp/kali folder:
$> sudo cp ./live/{initrd.img,vmlinuz,filesystem.squashfs} /srv/tftp/kali/
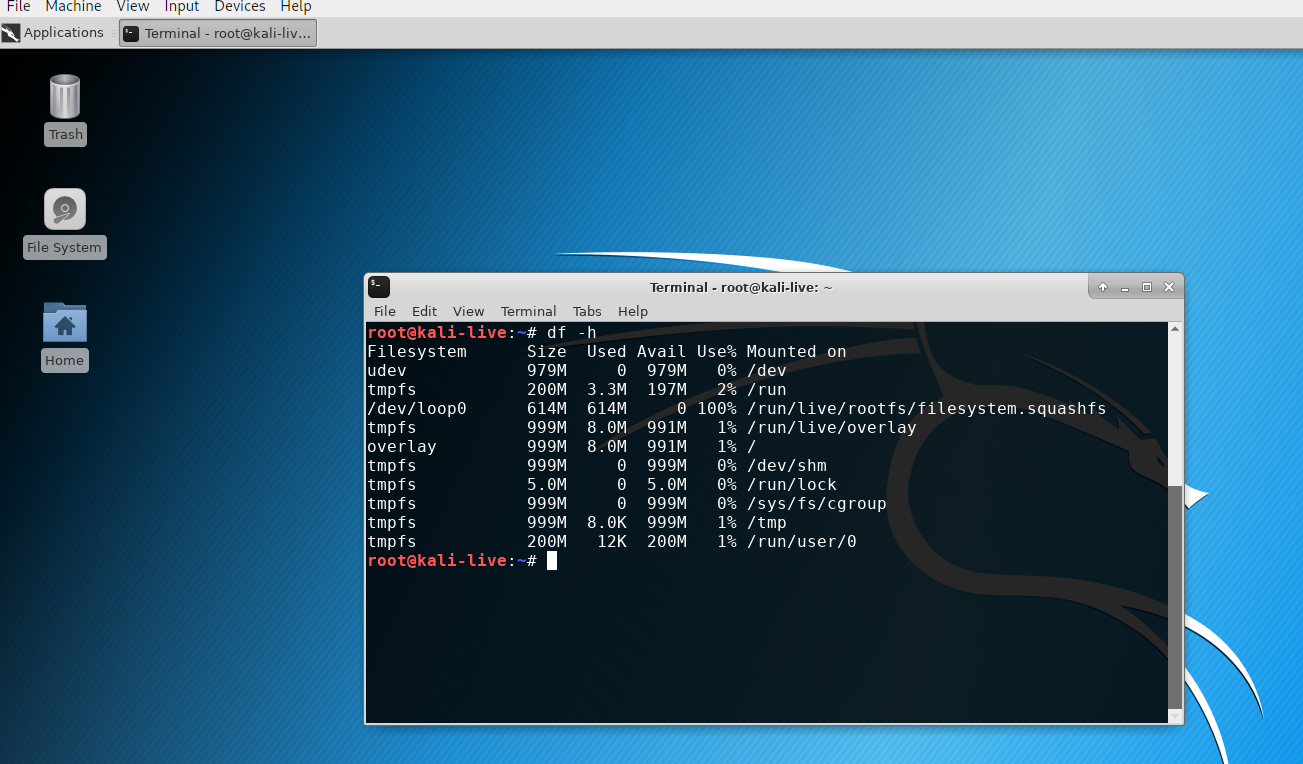
After that the boot process should work!
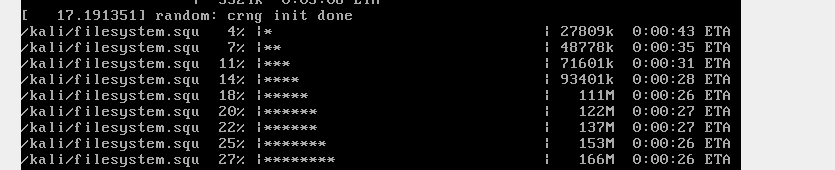
The fetch kernel parameter will instruct the system to download the filesystem.squashfs using TFTP and then using it as the root file system.
Depending on the network speed, this will take a couple of seconds, but in the end the kali desktop environment should appear!
-=-